
![]()
Border Elements is a very powerful Session Border Controller within the Voice Elements Platform. This software implementation runs as a Windows Service and accesses a SQL Server database for making call routing decisions. You can quickly and easily set up Border Elements and unlock all of it’s features. For more information about Border Elements, features and applications, see the article Border Elements – Our Powerful Session Border Controller (SBC).
Getting Started
SQL Server
Border Elements requires a SQL Server edition of your choice 2008 or better. Border Elements can be run using SQL Server Express on low load systems.
Download and Run the Border Elements Installer
A default folder ‘C:\Program Files\Inventive Labs\Border Elements\Installation Scripts’ is created containing ‘BorderElements.sql’ and ‘BorderElementsHistory.sql’.
Install your License
For more information, see Licensing Questions.
Determine your Border Elements Configuration
Stand-Alone Border Elements Architecture
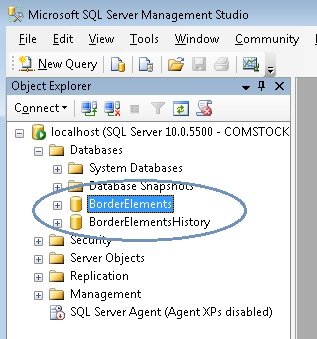
Border Elements can be installed in a standalone configuration. In this setting, you would create the BorderElements database on a single SQL server, along with the BorderElementsHistory database on that same SQL server.
Multiple Border Elements Installations with a Single, Common Database
For redundancy, you can have Border Elements installed on two different machines. These machines can be in different data centers (co-locations) or within the same corporate LAN. In this configuration, a single SQL Server can service both BorderElements installations. Here you would create the BorderElements database and the BorderElementsHistory database on a single instance of SQL server within your network.
Distributed Border Elements Architecture
Please note for those companies using Distributed Border Elements Architecture (multiple Border Elements servers within the same company), the Border Elements History Database would normally be installed on the main SQL server. In some distributed settings, SQL server replication can be used. In these cases, you need a SQL server for each Border Elements server. Regardless of whether using replication, where you want to maintain your session history tables will decide where you put your session history database. Inventive Labs can help you with your configuration design to accommodate more complicated systems.
To gain all of the benefits of Border Elements (the built in redundancy) you will want to install and setup at least two border elements servers, although many features are still available with a single server.
Create your Databases
Create the Border Elements Database
-
- Launch the SQL Server Management Studio
- Create a new database called Border Elements (right click on Databases; New Database…)
Create the Border Elements Database
-
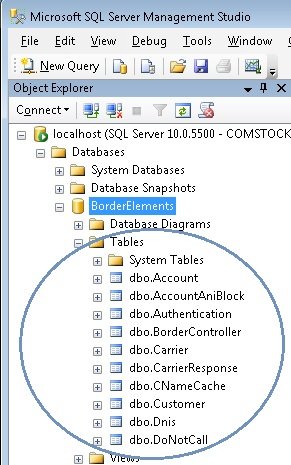
- Load and execute the script ‘BorderElements.sql’
- This will create all the tables, functions and stored procedures for Border Elements
Create the Border Elements History Database
-
- Launch the SQL Server Management Studio
- Create a new database called Border Elements History (right click on Databases; New Database…)
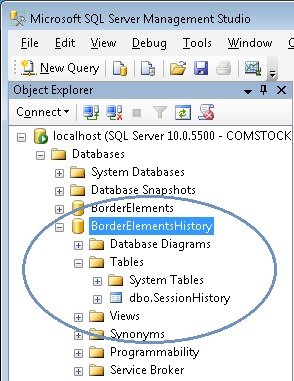
- Load and run the script ‘BorderElementsHistory.sql’
- This will create the session history tables
Create your Carrier Records
Using multiple carriers ensures that you will be able to make outbound calls despite any carrier outages that may occur. Also, you can define call paths so that the cheapest carrier available is used for each situation. For example, to realize cost savings you may have an 800 number for inbound calls that comes in on one carrier, and use a separate carrier when you dial out.
Set up each of your carriers:
Open the Carrier table (right click; edit top 200 rows)
Input the column values. Each row in the table defines one carrier.
Carrier ID
Automatically populated by the database
Name
Maximum of 50 characters
Name your carrier. Each carrier will need a unique name.
Short Name
Maximum of 5 characters.
A short version, or nickname, of the carrier name used to uniquely identify the carrier within the system. This will be used later in the Default Route setting of the Border Controller Table. For example if the carrier’s name is ‘Inventive Labs Dallas’, you could create a short name of IVLD.
Address
Maximum of 50 characters.
Not required for system operations. This refers to the physical location of the carrier which might be useful for considering the time zone the carrier is located in.
If not using, leave as NULL.
Dial Template
This defines how calls will be placed for this carrier.
If your carrier requires dialing a 1 first, enter: ‘1nnnnnnnnnn’ (10 n’s)
If your carrier requires the 1 be stripped from dialed calls, enter: ‘!1’
If your carrier is unconcerned with this, set field value to NULL
Queue Time Interval
Reserved for future use. Not presently operational. Set field value to 1000.
Max Queue Size
Many carriers limit the call starts per second (CPS) that you may place with their equipment. Border Elements allows you to queue calls when this limit is exceeded. Caution should be used when selecting the value for this field. If you are allowed 5 call starts per second and have a queue of 100, then a call could be queued for up to 20 seconds before it is sent to the carrier. The formula is:
Maximum Wait Time (in seconds) = MaxQueueSize / CallStartsPerSecond
If the queue is full for this carrier, the call being placed will be sent to the next carrier in the default route. See Default Route in Create your Border Controller Records.
Fail Response Codes
Reserved for future use. Not presently operational. Set field value to NULL.
Call Starts per Second
This setting controls the number of calls that can be placed per second using this carrier. Often carriers will limit the call starts per second, and this setting ensures that you won’t exceed those limitations. Check with your carrier to find out what this setting should be. See Max Queue Size above for more imformation.
Allows Outbound
True or False
Set to True if the carrier permits outbound calls. Set to False if it does not.
Rule Procedure
Enter the name of a user-written stored procedure in the SQL database.
This is an advanced feature for customers who wish to control the blocking of certain calls on certain carriers. To use this feature, you would need to create a stored procedure in SQL Server that determines whether or not a call should be accepted. For example, let’s say you have a list of “banned” phone numbers. You could create a stored procedure that determines if the phone number is in the “banned” list and those numbers would not be accepted from the carrier. You could also create a stored procedure to reject pay-phone calls for this carrier.
T38 Support
True or False
This setting controls whether or not the carrier supports T38 for faxing operations. When an INVITE is sent to Border Elements for an outbound call, you can include a header (IBC-T38FaxCarrier: True) in the INVITE request that directs Border Elements to only use carriers that support T38. When this header is present, Border Elements will only use carriers that have this value set to True.
If you are using the Voice Elements Platform, use the following code snippet to add the header to your INVITE request:
SipChannel sc = m_ChannelResource as SipChannel;
if (sc != null)
{
    sc.OutgoingSipHeaders = new string[] { "IBC-T38FaxCarrier: True" };
}
Allows International
True or False
Set to True if this carrier is capable of dialing international calls. Caution: If the carrier allows international calls, and you don’t want to allow international calls at all then set the value to False.
Allows Domestic
True or False
Set to True if this carrier is capable of dialing domestic calls.
What if I have no carriers and will not be allowing calls to leave my corporate network?
Use the following Carrier setup:
-
- Name — Null Carrier
- Short name — None
- Address — NULL
- Dial Template — NULL
- Queue Time Interval — 1000
- Max Queue Size — 100
- Fail Response Codes — NULL
- Call Starts Per Second — 10
- Allows Outbound — False
- Rule Procedure — NULL
- T38 Support — False
- Allows International — False
- Allows Domestic — False
What if my carrier has multiple IP Addresses for sending and receiving calls?
Often carriers will allow you to set up a primary and secondary IP address fro redundancy. You will need to set this up in Border Elements so that you can handle sending traffic to your carrier. The IP’s of the carriers are setup in the Authentication Table in a later step. For now, if you have two IPs that will accept traffic for the same carrier, you will need to setup two Carrier rows in the carrier table with two different Short Names.
Create your Border Controller Records
Open the BorderController table (right click; edit top 200 rows)
Input the column values:
Border Controller ID
Automatically populated by the database
Border Controller Name
Give your Border Controller a unique name. It could be the name of the server or other pertinent name that would apply to your system. Companies with Distributed Border Elements Architecture would give each Border Controller a unique name.
IP Address
Enter the IP Address the Border Elements server will be using for SIP traffic
Port
Enter the Port that Border Elements will be using for SIP traffic (default port 5060)
Default VE Authentication ID
For customers using Inventive Labs’ Voice Elements Servers, this can be set to the Authentication ID of the default Voice Elements Server that calls will be sent to when no other route can be found. Leave this NULL until you create your Authentication IdD for your Voice Elements Servers which will be done in a later step.
Default Route
Each Border Controller on your network has a default route for placing outbound calls. This setting defines that path. Here you will put each carrier’s short name in order with a comma to divide each individual carrier. For example if you have two carriers, InventiveLabs Dallas (IVLD) and InventiveLabs Salt Lake City (IVLS) and you want calls to first egress over the Dallas carrier you would specify the following:
IVLD,IVLS
With this default route, the border controller would try to place an outbound call on the Dallas carrier first, and then attempt a call on the Salt Lake carrier if Dallas’ queue is full, or if Dallas is unable to handle the call.
Define your Customers
Set up your own company as a customer. If you provide SIP Trunking for others, set up these customers in this table. Setting up this Customer table is a pre-requisite for setting up the Accounts Table.
Set up each of your customers:
Open the Customer table (right click; edit top 200 rows)
Input the column values. Each row in the table defines one customer.
Customer ID
Automatically populated by the database
Name
Maximum of 50 characters.
Begin with creating your business as the first customer. Continue entering all of your customers, if applicable.
Address
Maximum of 50 characters.
Enter the physical address of the customer.
Outbound Call Limits
Maximum of 10 characters.
Reserved for future use. Not presently operational. Set field value to NULL.
Username
Maximum of 100 characters.
Reserved for future use. Not presently operational. Set field value to NULL.
Password
Maximum of 50 characters.
Reserved for future use. Not presently operational. Set field value to NULL.
Set up Individual Accounts
Now that you have set up your company and its customers in the Customer Table, add a default account for your company. You can also add accounts for individual employees if you want to track employees on a individual basis. The account table allows you to track individual call data and group it as a whole for the entire company for billing purposes. You can set very granular settings on the Account Table to control how many and what type of calls a customer can make.
Set up each of your accounts:
Open the Account table (right click; edit top 200 rows)
Input the column values. Each row in the table defines one account.
Account ID
Automatically populated by the database
Customer ID
Enter the Customer ID defined in the Customer Table.
Name
Maximum of 50 characters.
Enter a name for this account, such as your company name, or if you want to track by employee, enter the employee name, extension #, etc.
SIP Username
Maximum of 100 characters.
This is the username designated for this account and can be an email address or typical username. If you are going to register a SIP device, this is the username that will be used for registering that device.
SIP Password
Maximum of 50 characters.
This is the password associated with the above username.
Maximum of 255 characters.
For customers using Border Elements with our Voice Elements servers, place the name of a file on the Voice Elements server that will be played if this account can not be reached. For example, if the system attempts to reach an end point for an incoming call and cannot reach that end point, it will transfer the call to a local Voice Elements Server and have that server play this message. This is an optional feature. Setting this up is not required.
If you will not be using this feature, leave it NULL.
Seconds Allowed
Integer
This setting controls the total amount of seconds that an account is able to make. You can limit accounts to a certain amount of calls by limiting this field. If you would like to allow them to make unlimited calls, this value should be set to -1.
Seconds Used
Integer
Enter 0 in this field. This field keeps track of the total amount of seconds that the account has used on calls. As calls end, the amount of seconds used on the call are added to this column.
Call Max Seconds
Integer
You may want to limit customers to shorter phone calls. This setting will automatically terminate the call once it has reached the maximum amount of seconds entered in this field.
Max Concurrent
Integer
This setting controls the maximum number of calls that an account can make at a single time.
Allows International
True or False
This setting controls whether or not international calls are allowed for this account.
International Seconds Allowed
Integer
This setting controls the total amount of seconds of international calls that an account can make. If you would like to allow the account to make unlimited international calls, this should be set to -1.
International Seconds Used
Integer
Enter 0 in this field. This setting keeps track of the total amount of seconds that the account has used on international calls. As calls end, the amount of seconds used on the call are added to this column.
Is Demo
True or False
Reserved for future use. Not presently operational. Set field value to False.
Default Route
Maximum of 100 characters.
Leave this NULL to use the Default Route defined in the Border Controller Table.
You may override the Border Controller’s Default Route on an account by account basis. Enter each carrier’s short name in order separated by a comma.
For example: IVLD,IVLS
Allow Pay Phone
True or False
You can choose whether or not to allow inbound calls from pay phones. Surcharges from these calls can get quite expensive. Note: the carrier must be able to report the ANI2 information in order to know if the call is coming from a payphone.
Registered Authentication ID
Used internally by the system. Do not populate.
Maximum of 100 characters.
Enter the email of the person administering this account.
Static Caller ID
Maximum of 50 characters.
If you specify a Caller ID in this field, it will always use this whenever this account places a call. If you have a Voice Elements Server, this would allow you to force a Caller ID and not permit the Voice Elements Server to set the Caller ID.
Set Up Endpoints / Voice Elements Servers
A SIP Endpoint in Border Elements is any SIP enabled device that can make or receive calls. A SIP Endpoint for example, can be a Voice Elements Server, a Polycom phone, an X-Lite softphone, a PBX, or asterisk server.
Set up each of your Endpoints:
Open the Authentication table (right click; edit top 200 rows)
Input the column values. Each row in the table defines one Endpoint.
Authentication ID
Automatically populated by the database
Endpoint Type
Integer
Enter either a 0, 1, 2, or 3 to identify the type of endpoint you are defining:
0 = Border Controller
1 = SIP Endpoint
2 = Voice Elements Server
3 = Carrier
IP
Maximum of 50 characters
The IP address of the endpoint.
Port
Integer
The port that the SIP Endpoint will use to send and receive SIP traffic.
Special Headers
Reserved for future use. Not presently operational. Set field value to NULL.
Handle RTP
True or False
This field defines whether you want to have Border Elements handle the RTP data between the two endpoints.
Set to True to have the RTP hairpin through Border Elements.
Set to False to have the RTP go directly between the endoints.
Account ID
Integer
Enter the Account ID defined in the Account Table that minutes get charged to when talking to this endpoint.
Border Controller ID
This is the Border Controller ID of the Border Controller that handles this call.
If your setup has redundant Border Controllers, use the Border Controller ID that will be handling this endpoint.
Carrier ID
Integer
The Carrier ID is only used if this endpoint is a Carrier. If so, enter the Carrier ID assigned in the Carrier Table.
Suspended
True or False
This field allows you to suspend the endpoint from sending or receiving calls without deleting the record. Operational endpoints are set to False.
Set to True to suspend the record.
Sequence
Integer
If you are not using redundant Border Controllers, set this to ‘1’.
If you have multiple Border Controllers that can place calls to the same carrier you will need two authentication records. The sequence determines which border controller will attempt to place the call first. If that border controller is down, the second Border Controller will place the call.
Description
Maximum of 255 characters
This field allows you to add more information to better identify the endpoint.
Allow IP Only Authentication
True or False
Set to False to authenticate by the IP and Port. This is the typical setting.
Set to True if you want to authenticate only by the IP address.
Registration Expiration
This field is for internal use. Initially set field value to NULL.
DNIS
Dialed Number Information Service
-
- 3 types of calls: inbound from carrier, outbound, in network call
- Defines how calls are received and directed to their endpoints
- Set up calls directed to voicemail
- Define each phone number and their failover route (BCs, SIPs, VE Servers, Carriers)
Set up your DNIS
Open the DNIS table (right click; edit top 200 rows)
Input the column values. Each row in the table defines one phone number.
DNIS ID
Automatically populated by the database
Dialed Number
Maximum of 50 characters
Enter the phone number you are setting up that is being dialed.
Border Controller ID
Integer
Enter the Border Controller ID that is handling the call.
Authentication ID
Integer
Enter the Authentication ID that is the endpoint that this call will be routed to.
Carrier ID
Integer
If this number is serviced by a carrier (inbound), place the Carrier ID in this field
Otherwise, leave NULL
Sequence
Integer
Calls may be presented to multiple endpoints. For example: rolling a call over to voicemail if the first endpoint does not answer, rolling a call to another server if it’s down, etc. When the call is presented to the Border Controller, it will route the call first to Sequence 1, then failover to sequence 2 (if defined). If you have multiple sequences, you will need to enter the dialed number for each failover record. Regardless, you should have at least one record with sequence 1 for each unique dialed number.
Max Dial Time
Integer
Used when setting up a failover; otherwise leave NULL.
When setting up a failover, enter the length of time in seconds that Border Elements will attempt to contact the endpoint specified by the Authentication ID before failing over to the next record.
The last sequence in a series should always be NULL.
Account ID
Integer
Enter the Account ID that this number’s activity will be billed to.
Maintenance Code
Integer
When testing a carrier and failover sequences, it is often desirable to have the Border Controller return a failure to the carrier.
Specify a valid SIP response code for this field and Border Elements will reject any inbound call using the code specified.
Only use this field for testing. Otherwise, leave NULL.
Description
Maximum of 255 characters
This field allows you to add more information to better identify the DNIS record.
Date Added
Date Time
For your own recordkeeping, you may enter a date and time that you added this record to the database.
VTN
Y or N
Reserved for future use. Not presently operational. Set field value to N.
Skip Internal Handling
True or False
Set to False to keep in-network calls routed within the network.
If you want to force a call to go out over a carrier knowing that the carrier will send the call back into Border Elements, set this to True.
Skip If Caller ID Hidden
True or False
Set to True to reject the call if the Caller ID is hidden.
If this is a call going to a SIP phone set up to fail over to voicemail, set to True on the first record and all calls with hidden Caller IDs will go to voicemail.
If set to True and no voicemail failover is defined, calls will be rejected back to the carrier.
Set to False to allow all calls regardless of Caller ID.
Anonymous Authentication ID
Integer
Normally NULL
The Border Controller is capable of accepting calls to a specify DNIS from any external IP without requiring you to enter the IP in the Authentication Table. You can use the feature to allow your system to accept any call from anywhere in the world.
If you wish to do this, you must first setup an anonymous authentication record as follows:
-
- EndPointType: 3
- Ip: Anonymous
- Port: 0
- SpecialHeaders: NULL
- Handle RTP: True or False based on your configuration
- Account Id: The Account you want to be charged for the calls
- Border Controller Id: The Border Controller handling the calls
- CarrierId: NULL
- Suspended: False
- Sequence: 1
- Description: For Calls to DIDs that allow anonymous access
- AllowIpOnlyAuthentication: False
- RegistrationExipration: NULL
Then, enter the Authentication Id created into this field.