Setup Step-by-Step
Editors note: These directions refer to version 1.0 of our VoiceElements for Teams product. Version 2.0 is in pre-release and includes single sign on support and tighter teams integration. If you need setup instructions for version 2.0 please click here.
These steps will help you Setup a direct routing SBC to our system in your Team’s Admin portal. It will also show you how to set things up in the Voice Elements portal. You will also be able to pick a phone number and assign that to a user.
If you would like to use existing phone numbers we can port those in. Contact support@inventivelabs.com for help with this.
If a phone number cannot be found, you will see a message.
Otherwise, click the drop down to select a city.
If you cannot find a number close to what you want, please contact us, we can help. support@inventivelabs.com
Now that you have phone numbers for your users, it is time to jump into the Microsoft Teams admin system so set up the users with phone numbers and a few other tasks.
This is the part where you are going to need the Teams Admin Role.
Open a new tab. Navigate to admin.teams.microsoft.com
Select Users
Make sure the users that you are going to add phone numbers to have the Phone System column set to “On”. If not, you need to add a Microsoft “phone system” license to that user.
The Microsoft Teams Admin portal does not yet have a place to assign a direct routing phone to a user but it will show the number when it is assigned. To assign a phone number for direct routing, Microsoft requires you to run certain administrative commands using a PowerShell interface. We have developed a simple PowerShell script that that will assist you in the process of setting the direct routing phone number for your users in teams. This must be run from your desktop.
Please download the tool using this link: https://download.voiceelements.com/TeamsPowerShellTool.zip
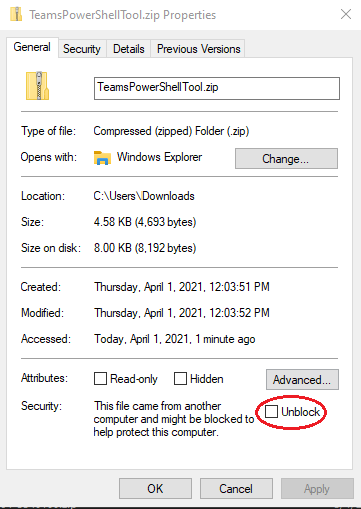
Before you unzip the file, we recommend that you copy the zip file to your desktop. Then, right click on the zip file and select “Properties”.
On newer operating systems there may be a button or checkbox to “Unblock” the file. This is because it was downloaded from the internet. Older operating systems will not have this and you can go ahead and close this window. However, if this is shown, please click or press Unblock and then press OK.
After you are done you should now unzip the file to a folder on your computer or desktop.
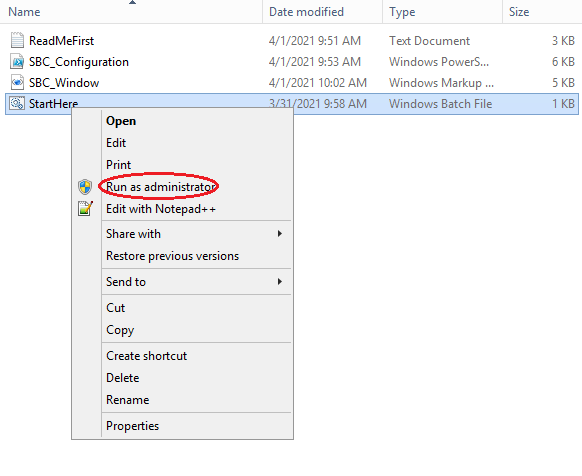
The next step is to run the “StartHere” as an administrator. Do this by right clicking on the “StartHere” and selecting “Run as Administrator”.
This will start the tool. Be aware that the first time you run the tool it will check to make sure you are running the correct version of PowerShell, give you access to NuGet as a package provider and then download the MicrosoftTeams modules. This takes a moment to do, so be patient. If you have any trouble, please contact: vesupport@voiceelements.com.
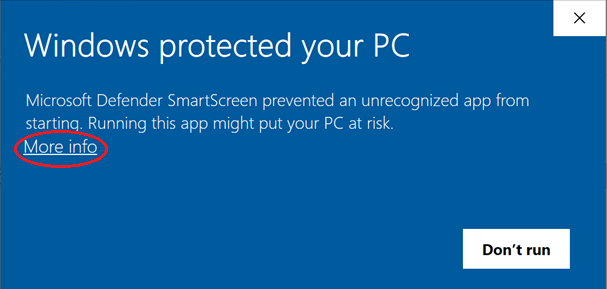
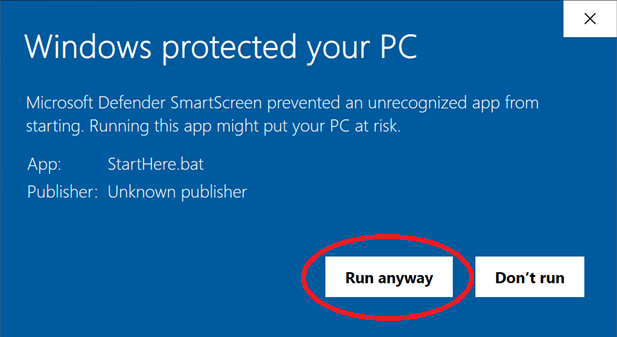
Note: If you see this screen, you will need to allow the running of the tool. Do this by selecting “More Info” and then selecting “Run Anyway”
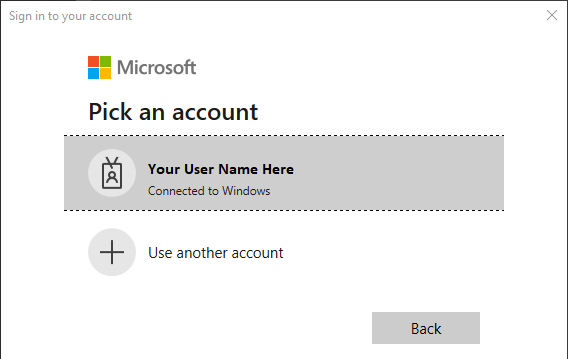
Following a successful installation, you will be prompted to login to your account. Please login using an account that has permission to administer your domain.
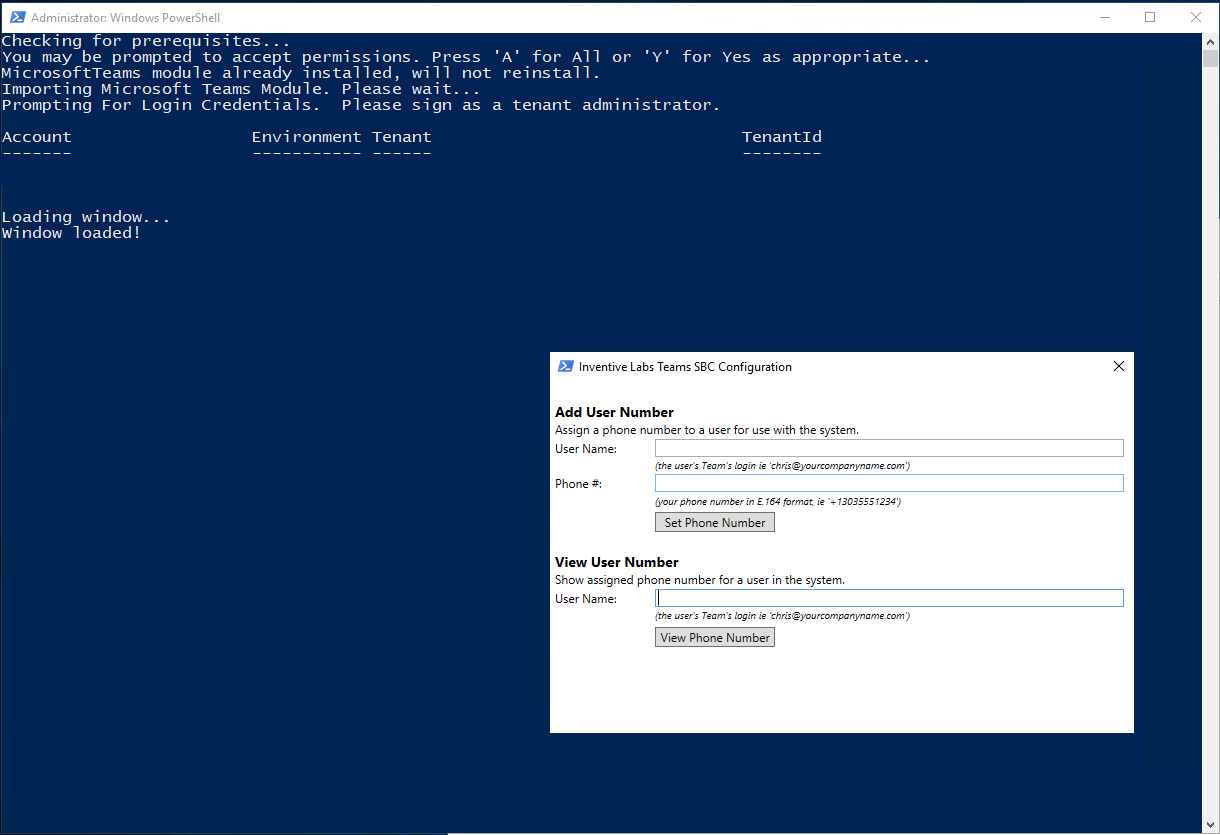
After logging in, you will see the PowerShell window and the configuration panel. We suggest running them side by side or positioned in a way that is similar to the way shown.
This way you will be able to see the output of the PowerShell window as you run commands from the panel.
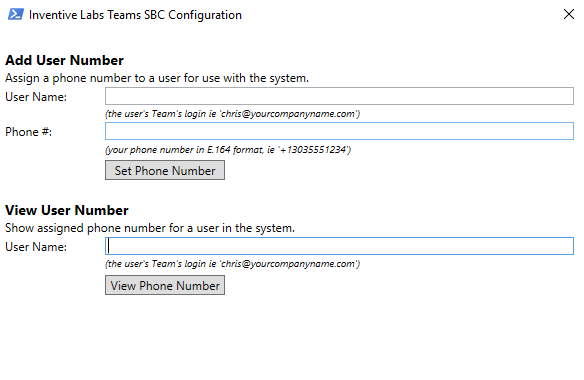
To add a number for a user you will need to enter the user’s id into the panel. The format is: someusername@yourdomain.com and the format for the phone number is +1XXXYYYZZZZ where XXXYYYZZZ is the 10 digit number created for the user in the previous steps. After you enter this information press “Set Phone Number”.
Give the script a moment to run. You will see a message when the assignment is complete. If there is an error, it could be because the user does not have a phone system license. If this is the case, purchase a license from your reseller and assign it to the user, or if you do not have a reseller, contact vesupport@voiceelements.com and we can assist you.
To view an already assigned number or to check on a user, enter the user’s id in the lower panel and press “View Phone Number”. If the number is assigned you will see it in the PowerShell Panel.
Proceed to assign all of the numbers to your users as appropriate. After you have assigned all of the numbers to your users you may proceed to the next step. You can run this tool again at anytime to assign more numbers as needed,
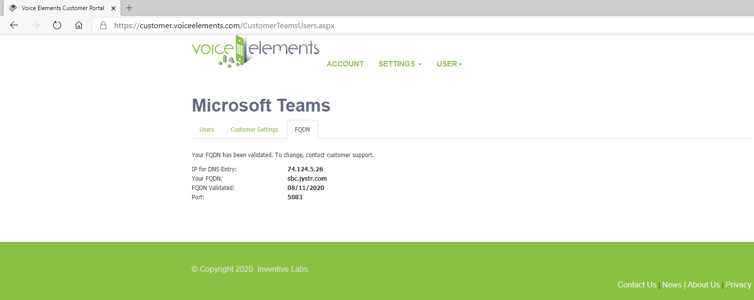
For MS Teams to talk to our system you will need to make a DNS entry to point to the IP address shown on this screen.
You make up the FQDN. Normally people call it sbc1.yourdomain.com
In your DNS, Enter an A record for your FQDN and point it to the IP address. DNS Instructions
Key in the FQDN and press “Verify DNS”


