
Once you have installed HMP Elements, you will need to modify your router to forward the SIP and RTP traffic to your HMP Elements Server. To do this you will need to do the following:
Access Your Router’s Configuration Page
You’ll need to know how to access your router. Each manufacturer uses different settings, to determine what your router’s address is, you can perform the following command in a command line window: tracert inventivelabs.com

The first “hop” should be your router. Most routers allow you to access it’s settings by typing the ip address into the browser. In the example above, you would type http://192.168.1.1. You will likely be prompted for your username and password. You may need to lookup your router’s default username and password if you have never accesses the settings before.
Setup Port Forwarding
Port forwarding instructs your router to pass any packets using a given port to be forwarded on to a particular address in your network. If you do not allow port forwarding, your packets will often get dropped when they reach your router. We need to instruct your router to forward both SIP traffic and RTP traffic to your HMP Elements Server.
To do this you will need to determine how to change your router’s port forwarding settings. Each router manufacturer maintains a different format for modifying these settings.
Below is an example of how to set up port forwarding with a linksys router:
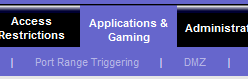
Once you have logged in to your router’s configuration page, select “Applications and Gaming”. It is in this subsection that you will be able to set up port forwarding.
Forward SIP Traffic to the HMP Elements Server
Once you have found where to edit port forwarding settings, you will need to instruct SIP traffic (port 5060) to be forwarded to the IP address of your HMP Elements Server.
Below is an example image that shows port from external port 5060 being forwarded to 192.168.1.110.
![]()
Forward RTP Traffic to the HMP Elements Server
Now that SIP traffic is being forwarded to HMP Elements, we will need to make sure that RTP traffic is forwarded. RTP traffic contains the audio that will be sent for a phone call. By default HMP Elements starts at port 49152 for RTP traffic.
RTP traffic uses two ports for each individual phone call. This means that if you have a 4 port system, you will need to open up ports 49152 to 49160 (8 ports) for RTP Traffic. If you had a 50 port license of HMP Elements, you would need to open up ports 49152 to 49252 (100 ports).
Many routers have an option to configure port forwarding for port ranges. Below is an example of what this looks like for a linksys router:
![]()
Grant HMP Elements access in Windows Firewall
If you are running Windows firewall, you will need to grant HMP Elements an exception so that your calls are able to get routed correctly. Windows Firewall allows two methods to grant traffic:
By Port By Application
We recommend granting access by Port as this will allow diagnostic utilities to have access. It can also prevent headaches in the future, because Windows Firewall may lose the Application settings once you have uninstalled or modified a program. To grant access by port, you will want to open up Windows Firewall. This can be done by doing the following:
- Browse to the Control Panel
- Open up the System and Security Settings
- Click on Windows Firewall
- Click “Advanced Settings”
You should now see a screen that shows all of the different Windows Firewall rules. On the left you will see a section for Inbound Rules and Outbound Rules. We will want to set up both an inbound and outbound rule to allow HMP Elements to receive and place phone calls.
To set up an inbound port exception:
- Right click on Inbound Rules
- Select “New Rule”
- Select “Port”
- You will be prompted if the rule applys to TCP or UDP. Select “UDP”
- Select “Specific Local Ports”, and enter the ports that you would like to allow the SIP traffic to be received on. This should include both the SIP traffic (usually port 5060), and RTP traffic (generally, ports starting from ports 49152 and up). For example, if you were running 100 channel of HMP Elements, and you receive SIP traffic on port 5060 you would have something that looked like this: 5060, 49152-49352 (Remember, you need to open 2 ports per HMP Elements Channel) Alternatively, if you had a 4 port license, it would look like this: 5060, 49152-49160
- Click “Next”
- Select “Allow the connection” and click “Next”
- Select the profiles that apply (Domain, Private, Public)
- Click next to save the changes
- Repeat these steps for Outbound Ports
To test these settings, you may either make test calls, or run the Router Test tool.
Other Notes
HMP Elements uses UDP for SIP and RTP traffic. Most routers allow you to define which protocol to use for a particular port forwarding setting. You only need to allow UDP traffic, but both UDP and TCP will work as well.
HMP Elements allows you to customize several different settings. For example, you may want to change your SIP traffic to use a port other than 5060. Additionally, you may want to change the base port for RTP traffic from 49152 to a different value. As a base port for RTP traffic, this means that the actual ports used will be different depending on the number of HMP Elements ports you are licensed for. For example, if you have a 4 port license, HMP Elements would use udp ports 49152 to 49160 for RTP traffic. It’s important to make sure that the ports that will be used by the RTP traffic are being forwarded by the router, otherwise your calls may not have audio. For a list of settings that can be changed, you may go here:
HMP Elements – Configuation Settings
Testing Your Configuration
To test your router settings, you will need to send a packet from a server outside of your local network, to make sure that the packet is correctly forwarded to your PC/Server. There is a Router Test tool that does exactly this, which you can use from the Elements Dashboard. You can access the router test by going to Tools > Router Test, as seen below:
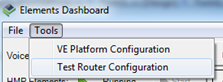
The Router Test tool should be able to automatically detect your external IP address by using a web service. If for some reason it detects your external IP address incorrectly, you may enter it in manually. It should also be able to detect the internal IP addresses on your system. If you have more than one you will need to select it from the listbox. Lastly, you will need to enter the port that you would like to test.
Once you are finished, click “Start Listening“. You may then press the “Send Packet” button. If the packet was successfully received, you should see a popup box that says “Test message to: {Your Ip Address} on port: {The Port you entered} received!”. If you do not see the message within a period of a few seconds, you will need to double check your router’s port forwarding settings and try again. To test another port, just enter it into the port textbox and click “Start Listening“.