
Install Voice Elements and Start the Services
After you have installed Voice Elements, the first thing to do is to start HMP Elements service and then the Voice Elements service:
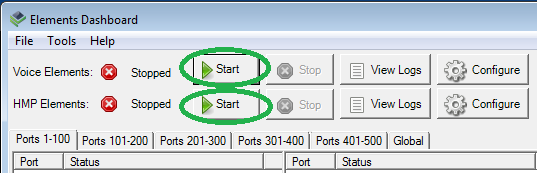
Note: This step is only required after the initial installation of Voice Elements. On subsequent reboots of the system, these services are started automatically.
Once both services have successfully started, the “Ports” table will be populated with the names and statuses of all licensed ports:
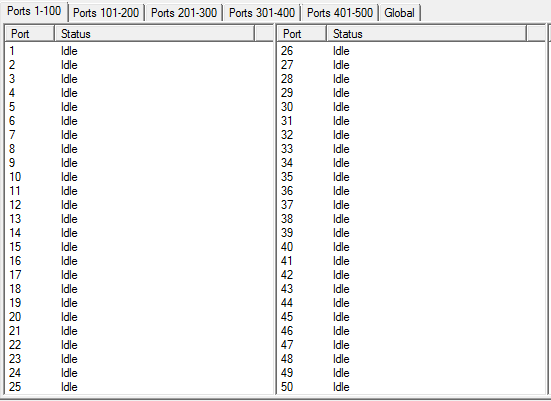
The number and type of ports available is determined by the features licensed.
Make Your First Outbound Call
To make your first test call, start the VESampler application, which is included with Voice elements. To do so, click the “Start Sampler” button in the Elements Dashboard:

The VESampler provides several sample application scripts and shows the source code for each. When it starts, it should automatically connect to the local Voice Elements server. To verify this, check the log output in the bottom pane and confirm it shows “Connected to Voice Elements.”
Start the Soft-Phone Application
After the VESampler is running and connected to the Voice Elements server, go back to the Elements Dashboard and start the included soft-phone application:

The soft-phone is a WebRTC application. As such, it currently requires a fully WebRTC-compliant web browser, such as Google Chrome (Firefox support should be available soon). Please also note that the soft-phone will launch in the default web browser for your system, so you can either set Chrome as the default before launching it, or copy and paste the URL to Chrome once it has opened.
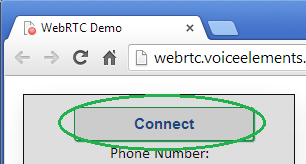
Connect
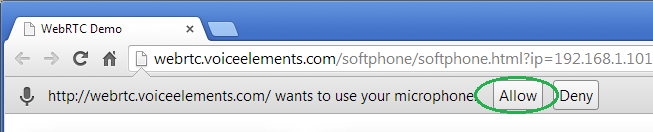
To make a call, click the “Connect” button and select the option at the top of the browser window to allow access to the microphone:
Allow Microphone
Send Call
Now, click the “Send Call” button to actually place the call. This will send a call to the VESampler application’s Inbound IVR test script, which will play a brief greeting, collect several DTMF and play them back, and finally record a brief message and play it back.
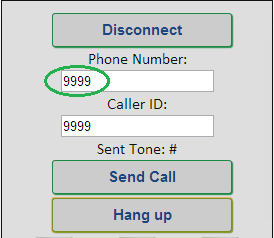
Place an Inbound Call
If you would like to place an inbound call to the soft-phone, change the “Phone Number” to “9999” and click the “Send Call” button:
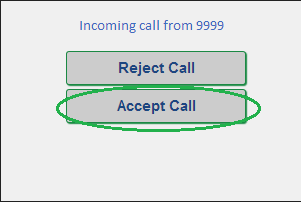
When prompted, click “Accept Call”:
To end the call, click “Hang Up.”
Have more questions?
If you would like to schedule a free consultation with a Voice Elements engineer, please send a request to Support.
The Engineer can help you as follows:
- Explain the various deployment options of Voice Elements
- Answer your questions
- Explain how it works
- Help you get started with the skeleton project
- Help you with any problems that you might have encountered during the install
- Give you ideas about how to accomplish your objectives
This consultation can be done using remote meeting software such as GoToMeeting or Join.Me.