
Ready to Deploy On-Premise?
When you sign up for a demo, you are given an account in our portal containing sample solutions to test Voice Elements’ powerful features. These all run on your local desktop and control our Cloud Services Platform. It is best to first become familiar with the features in each sampler in this environment.
Then if you would like to build your application on your premise, your next step is to activate a demo license for Premise Services.
This installation guide walks through the process to demo our Premise Services.
Table of Contents:
- Request Voice Elements Premise Services Demo
- Install the Voice Elements Setup Wizard
- Run the Voice Elements Setup Wizard
- Voice Elements System Test Application
- How to Run your Samples on your Premise-Based Server
- Build and Test Your Application
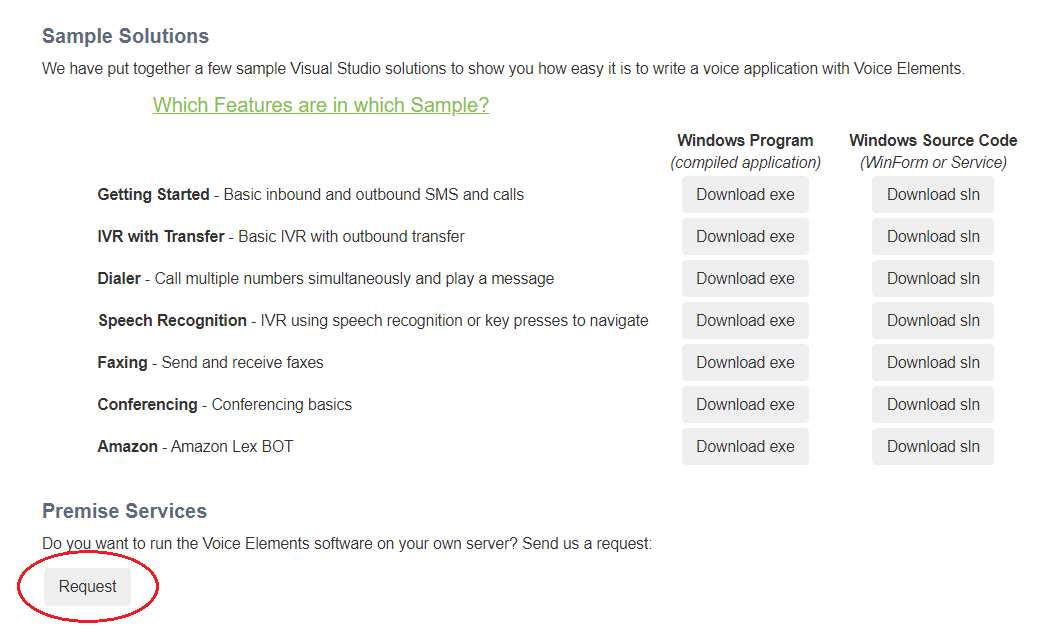
Request Voice Elements Premise Services Demo
-
- Click on Request.
- When the Voice Elements Support Team authorizes your premise account, a notice will be sent to the email address for your account.
- Your Customer Dashboard will be updated to reflect Premise Services have been enabled.
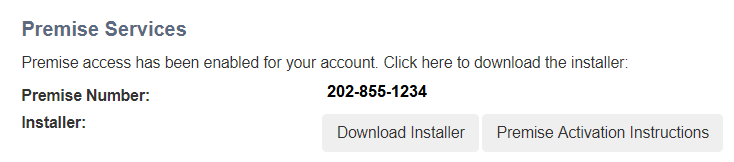
Download the Installer
Click the button Download Installer. The ZIP file will be downloaded to your machine’s Downloads folder. You might also find it in the tray at the bottom of your browser window. Unzip the folder and extract the files to your chosen location. Look for the application named VEPlatform and run it.
Run Anyway and Allow Access
Your device might recognize the file as an unrecognized app with an unknown publisher and ask if you are sure you want to run it. Select the option that will confirm that you want to run the application anyway.
Your firewall might prompt you to confirm access to the app. Select the option that allows access.
Once you have removed the obstacles, the application will run.
Install the Voice Elements Setup Wizard
Check the box to agree to the License terms and conditions, and click the Install button.
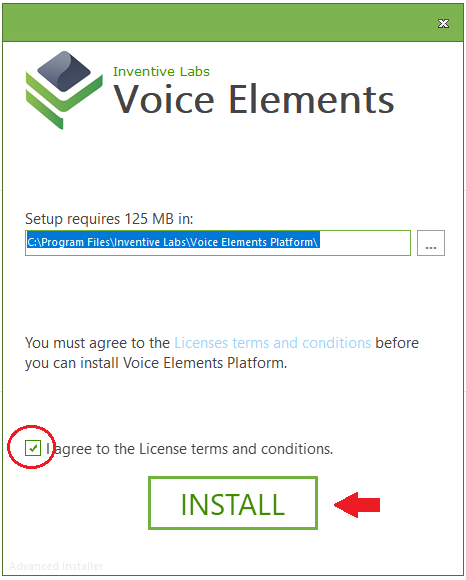
The installation will complete.
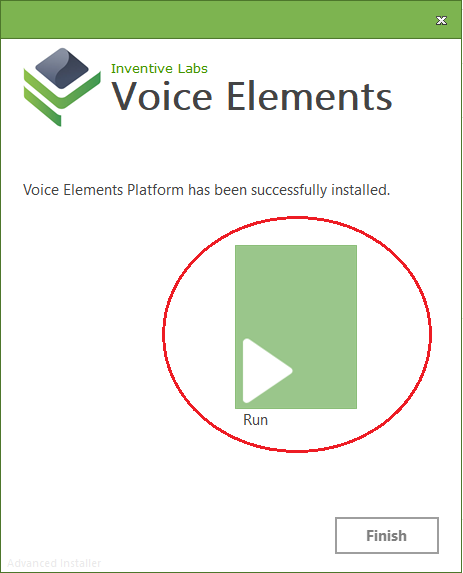
Click Run to launch the Voice Elements Setup Wizard.
If you click Finish to run the wizard later, note you can run it from the Dashboard icon on your desktop. Or find the folder in the default location: C:\Program Files\Inventive Labs\Voice Elements Platform\Dashboard.exe.
Run the Voice Elements Setup Wizard
- Each tab represents a step in the installation process.
- You must complete them in order, however you can go back to previous tabs to make any necessary changes.
Enter your License Key
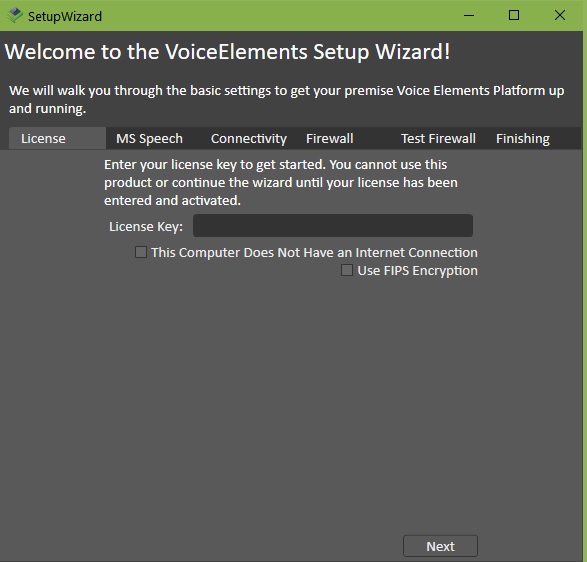
Enter the License Key in the field and check any other options that apply. Press Install.
You will receive a confirmation popup that your license was installed successfully. Press OK.
Set the MS Speech Default TTS Voice
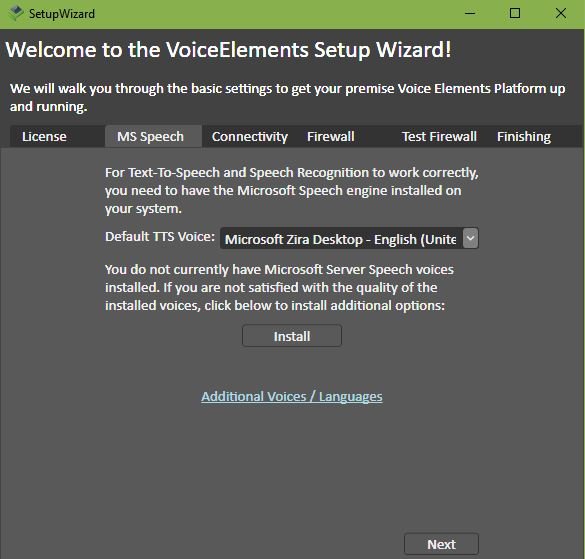
Select the TTS Voice you desire and click Install.
A pop up screen for the Microsoft Server Speech Installation will come up. Check the box to accept the terms of the Microsoft Server Speech License Agreement and click Install. Then press Finish.
Click Next at the bottom of the MS Speech tab.
Connectivity

Select your choice of Carrier/Gateway/Device. During your demo, you will select Inventive Labs Sip Trunking.
-
- Note that if you select Other, there are 4 other locations you can select when you are developing and testing your application. These alternate connection locations are detailed in our articles Connect to a Third Party SIP Carrier and Connect to your SIP based PBX or Gateway.
Enter your server’s Public IP.
Verify the Local IP and Port to use.
Press Next.
Confirm the changes to your configuration.
Set up the Firewall
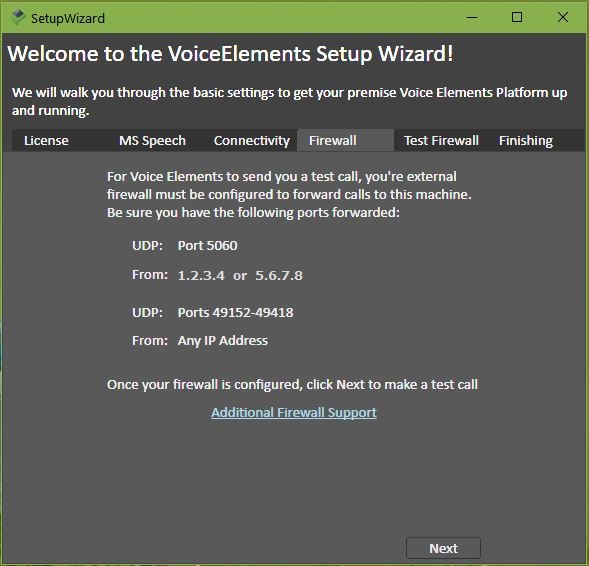
You may need to contact your network support team for resolving any firewall issues.
When ready to proceed, press Next.
Test the Firewall
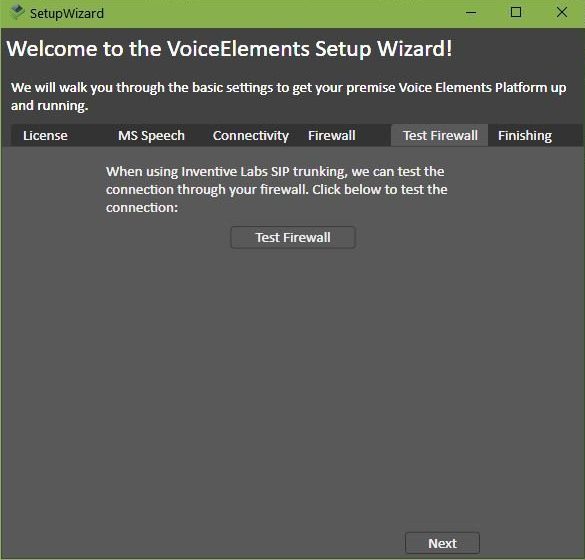
Firewall Test Failed?
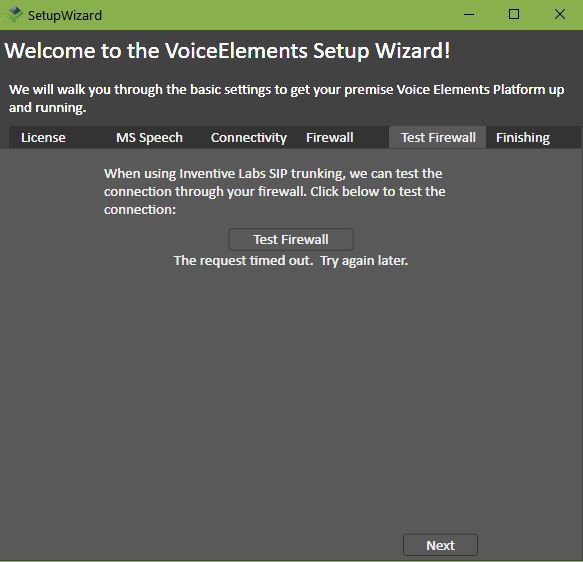
Firewall Test failed? Check your firewall settings and test the firewall again.
If the Firewall Test is successful, the screen will return Success!

Run the Sample App
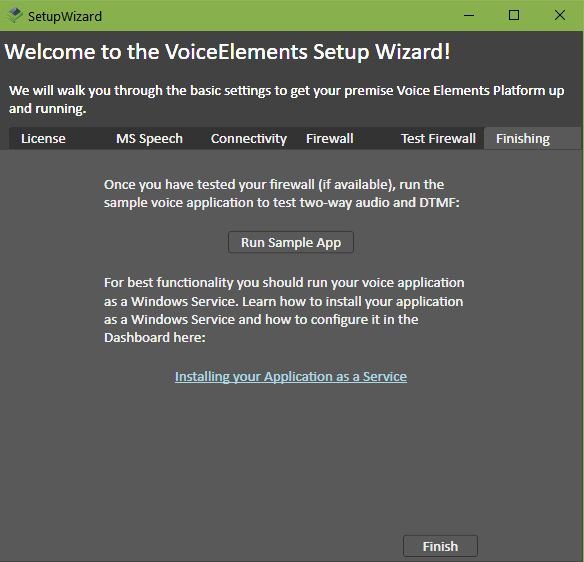
Voice Elements is set up and ready to send and make calls.
The Sample App is a test application to verify connectivity with Inventive Labs SIP Trunking or your carrier.
Click Run Sample App to run the System Test Application.
Voice Elements System Test Application
You are now ready to make some test calls!
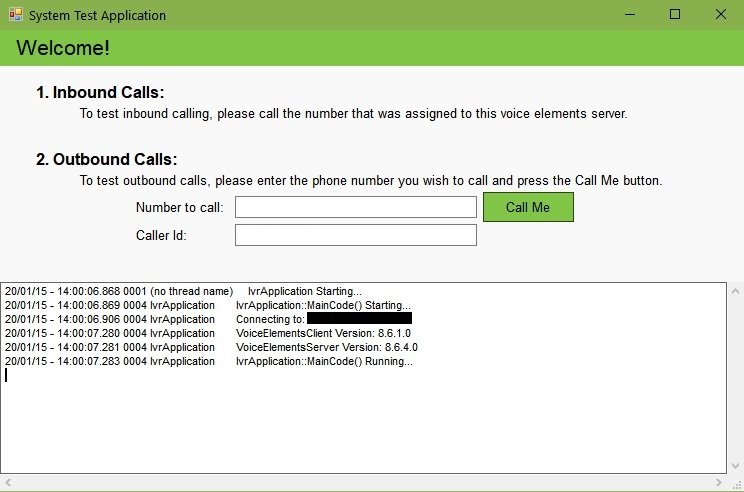
Note: In the log, the blacked out area in this screenshot would show your IP Address.
Test an Inbound Call
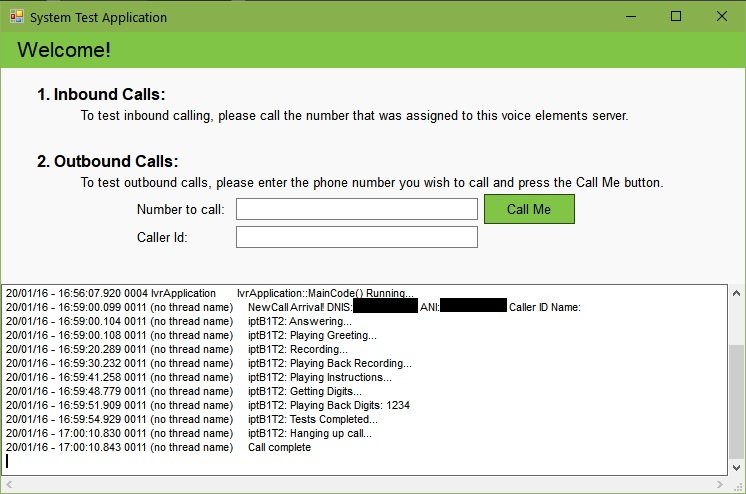
Note: In the log, DNIS shows the number you dialed and ANI is the number you dialed from. If a Caller Id had been set, it would also show in the log.
Test an Outbound Call
Enter the number to call. If not auto-filled, enter the Caller ID to display. Click Call Me.
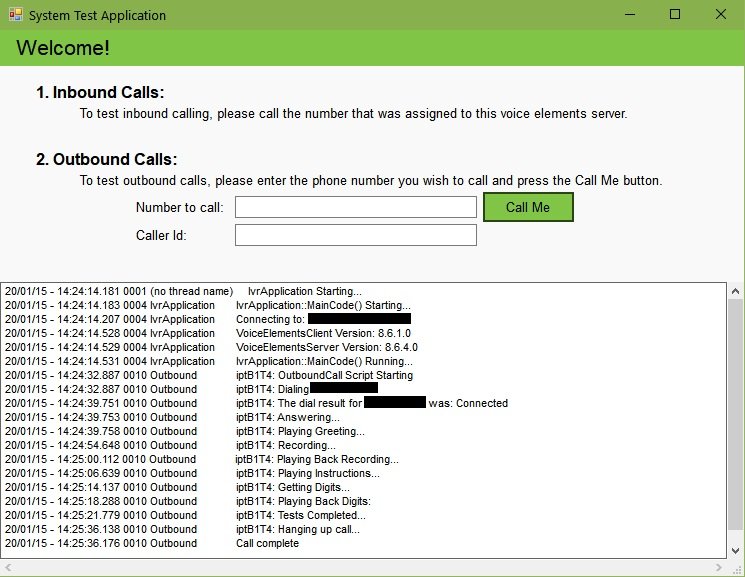
Note: In the log, the blacked out sections in this screenshot would show your IP address and the number you are dialing.
When you are done testing, close the window.
How to Run your Samples on your Premise-Based Server
You can point any of the samples that you previously downloaded from your customer portal so that they run on your premise server. You will need to edit each samples’ config file as follows:
1. PhoneServer IP Address
-
- Change the PhoneServer setting to the IP Address of your new premise-based server:
<setting name="PhoneServer" serializeAs="String">
     <value>yourIPaddress:54331</value>
</setting>
2. Username and Password
By default, the Premise-Based Server username and password are ‘username’ and ‘password’ respectively. So you can either change your demo settings to username and password, or alternatively, you can go into the configuration of the Premise-Based Server and make it the same credentials as your demo, or you can change the username and password to something unique. They just need to match.
-
- Change username and password values:
<setting name="UserName" serializeAs="String">
     <value>username</value>
</setting>
<setting name="Password" serializeAs="String">
     <value>password</value>
</setting>
3. Test Phone Number
-
- Change TestPhoneNumber value to the number that was assigned to you for premise testing:
<setting name="TestPhoneNumber" serializeAs="String">
     <value>1234567890</value>
</setting>
Voice Elements Premise Dashboard
We’ll walk you through the Dashboard in this article: Using the Voice Elements Dashboard.
Build and Test Your Application
Now you can build and test your application using your premise demo license. When you are ready for production, contact Support to purchase your production license.
Our Pricing page details all the options available to you.
Premise licenses can be paid for on a subscription basis or purchased outright. For details about our software maintenance program, see Support Program and Support Policy.
Our Support Team can help guide you in determining what type of license would be a good fit for your organization and how many ports your application might need.