
Initial Configuration
You’ll want to run through the initial configuration by using the steps in this article Set Up Border Elements
You should:
* Create the database
* Create the Border Elements History database
* Create Your Border Controller Records
Once you’ve done the initial setup above, you can use the Configuration Website for most of the configuration changes that you’ll need to make to Border Elements.
Copy From Feature
Most items that are configurable allow you to use the “Copy From” feature. This feature allows you to easily add items that are similar to other items that you have already created.
For example, let’s say you have an existing DNIS that points to an Endpoint, and you would just like to add an additional DNIS to point to that same endpoint. You would do the following:
1) Go to DNIS > View Dnis
2) Find the DNIS that you would like to copy from. It can be helpful to use the Search By Phone Number for this.
3) Click the “Copy From” link.
4) This should have all of the data the exact same, except the Dialed number won’t be populated.
5) Modify the “Dialed Number” field and click “Submit”
By following the above steps, you will have successfully copied all of the existing settings from the existing DNIS to your new DNIS. You can use similar steps to configure nearly everything in the Border Elements Configuration website.
Adding or Editing a Carrier
You will need to fill out the following information:
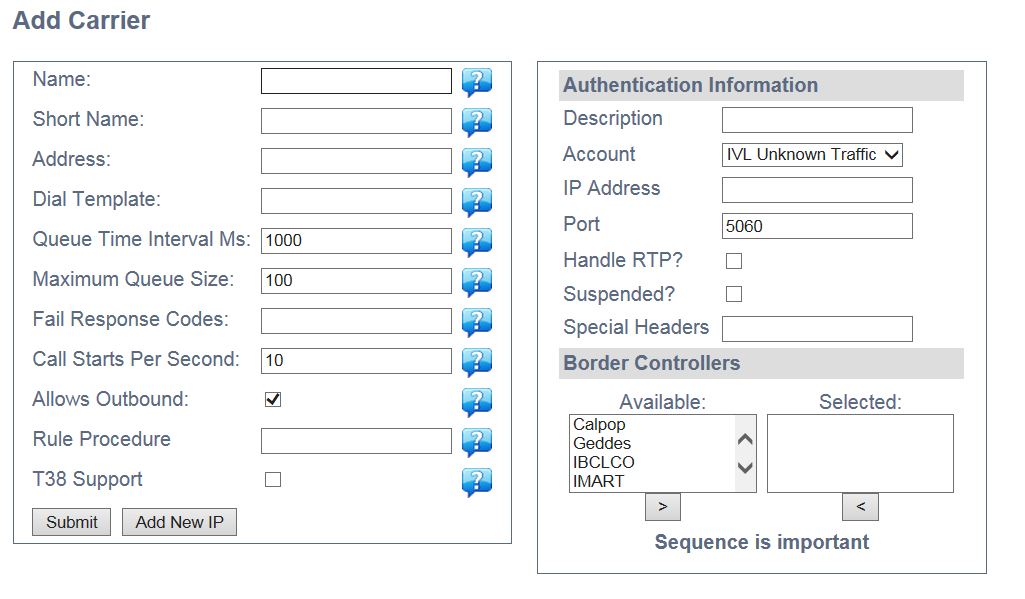
For information on carrier specific information that you will need to add (data to the left), please see Create Carrier Records in the article Set Up Border Elements.You will also need to enter the following information that applies to the authentication record:
Description
This should describe the route that you are setting up.
Account
This is the account that the carrier record belongs to
IP Address
This is the IP address of the carrier
Port
This is the Port that you will use to send calls to the carrier
Handle RTP
This determines if we would like Border Elements to Hairpin the audio. Unless you know you want this feature, don’t check this box as it will consume more resources in Border Elements.
Suspended
Use this setting to suspend the use of a carrier.
Border Controllers
This setting controls which border controllers can communicate with the carrier that you are setting up. This setting is used for call failover. For example, carriers will let you specify multiple IP addresses to use in case the endpoint that they send the call to fails to respond. If you set up a border controller on each of these IP addresses, you can then configure failover for certain inbound phone numbers. Please see the Add DNIS section for more information about this.
Special Headers
If there are any special SIP headers you would like to use when sending an outbound call, you would populate that data here.
Adding or Editing an Endpoint
You will need to fill out the following information:
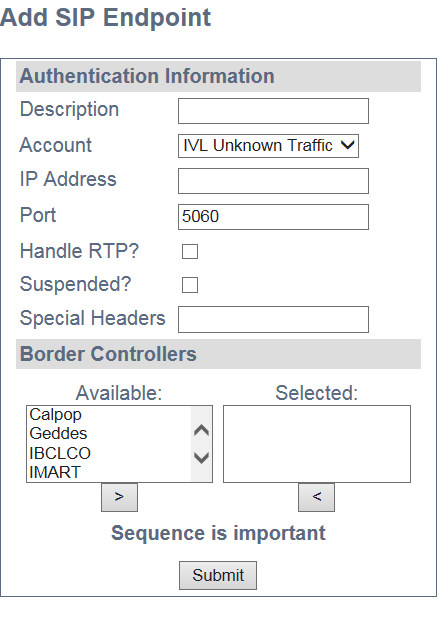
Description
This should describe the endpoint.
Account
This is the account that the endpoint record belongs to.
IP Address
This is the IP address of the endpoint.
Port
This is the Port of the endpoint. It’s important to set the IP address and port up correctly to communicate with your SIP endpoints.
Handle RTP
This determines if we would like Border Elements to Hairpin the audio. Unless you know you want this feature, don’t check this box as it will consume more resources in Border Elements.
Suspended
Use this setting to suspend the use of an Endpoint.
Border Controllers
This setting controls which border controllers the endpoint can communicate with.
Special Headers
If there are any special SIP headers you would like to use when sending an outbound call, you would populate that data here.
Adding or Editing DNIS
When adding a DNIS, you will be asked for the following information:
Based on the carrier that you select, we determine which border controllers are configured with that particular carrier (see the Add a Carrier section). You then add routes for when a call with that DNIS is received by the Border Controller.
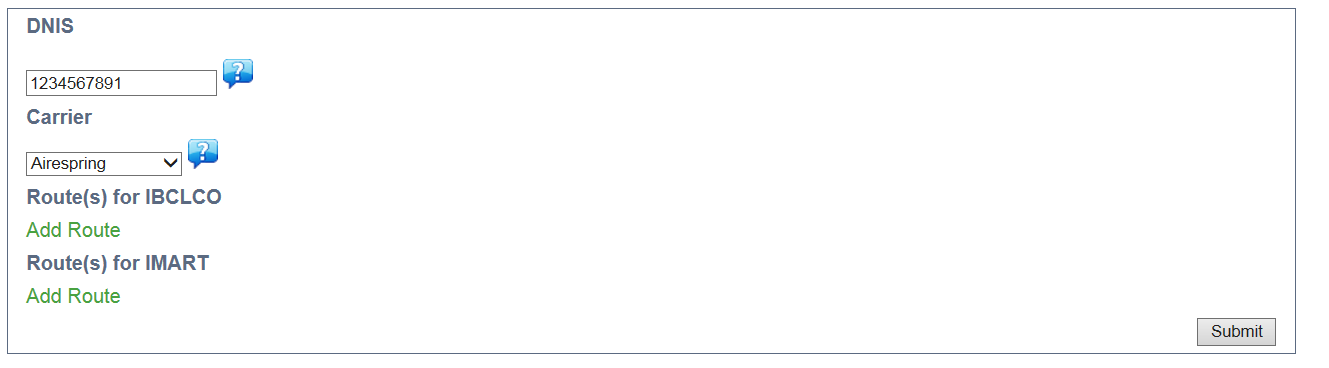
To add a route, click “Add Route”. This will bring up a list of endpoints that are configured for a particular border controller.
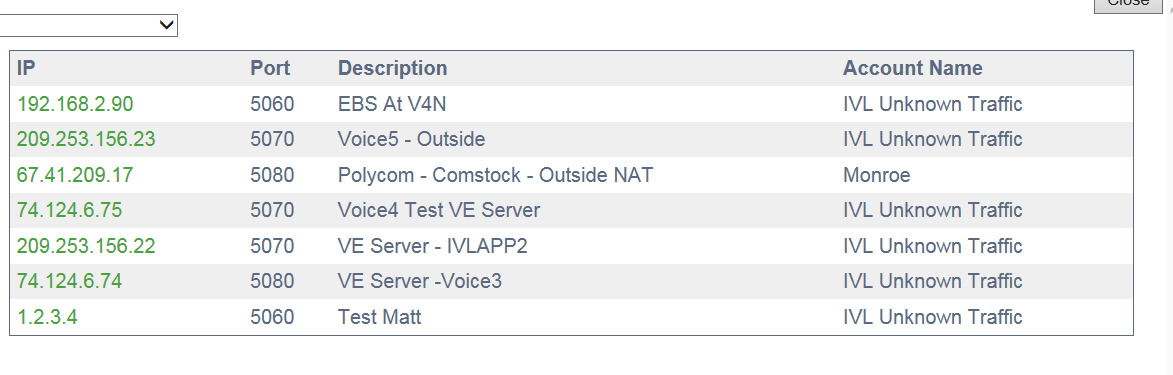
To select an endpoint to send a call to, simply click the link in the IP address of the endpoint.
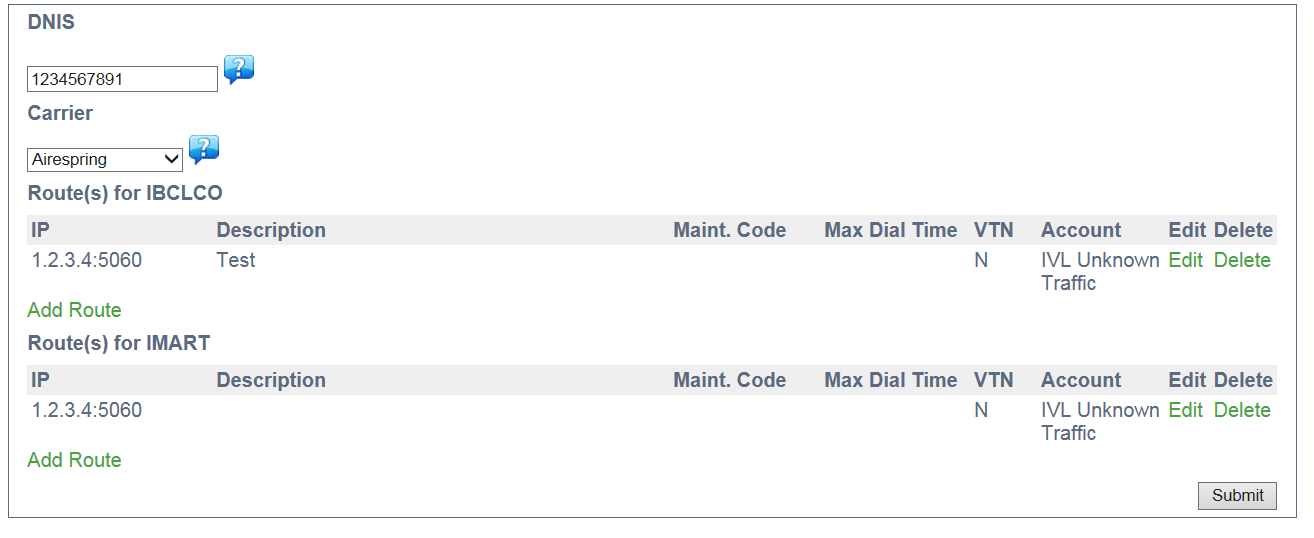
You can select multiple endpoints for each border controller. This means that Border Elements will failover, once it’s reached the maximum amount of time that you’ve specified.
In the example above, it will try to send the call to 1.2.3.4:5060 for 10 seconds, before trying to send the call to 1.2.3.5.
Need Assistance?
Contact support if you need assistance or have any questions. We’re always happy to help!