
Mobile Elements is a VoIP mobile application which runs on Android, iOS and Universal Windows platforms. This application has been built using Xamarin forms cross platform development environment which is a built-in feature in Visual Studio. The Mobile Elements application supports outbound and inbound calling facility using the Voice Elements server platform and a wifi connection.
Steps for Running Mobile Elements in iOS Platform
You need to have an Apple ID and Password to deploy your application to your device and the Apple Store. You will also need a MAC machine. Apple requires that applications are side loaded from a MAC type machine. For better understanding of application development on iOS devices, please refer to this Microsoft article: Get Started with Xamarin.iOS. Please note you must do the following steps prior to running the application.
Installation
- You can develop and deploy an application on the iOS device by installing Xamarin Studio on the Mac machine. Visit here to download and install the Xamarin Studio product on your Mac machine. You can only develop Android and iOS applications in Xamarin Studio on Mac machine. In order to support all the three platforms (Android, iOS, Windows) on the Mac machine, you need to install Parallels Desktop on the Mac which can run the Visual Studio under Windows.
- You need to install the Xamarin Mac Agent/Xamarin Build Host on the Mac machine. It gets installed with the Xamarin Studio. It links the Windows PC which runs Visual Studio to the Mac machine over the network.
- You also need to install the Xcode from the App Store on the Mac machine. Xcode is an integrated development environment developed by Apple to develop software for OS X, iOS etc.
Device Set Up for Development
Generating Development Certificate
- You have to request for Certificate Signing Request which will be uploaded to generate a certificate. Go to Applications->Utilities->Keychain Access on your Mac machine. From the main menu, navigate to Certificate Assistant->Request a Certificate From a Certificate Authority. Fill in your information and save the CSR to a place where you can find it.
- You need to request for a development certificate from Apple. Login here and select Certificates, IDs & Profiles from the left column. Then click on the + sign to create a new certificate. Choose iOS App Development in the next page and click on Continue. The next page will give you instructions on how to create a certificate signing request which you have already done. In the next page, upload your saved CSR file and click Continue. Then Download and double click on the certificate. Verify the association of your certificate and private key in the login->Keys category of Keychain Access utility.
Creating App IDs
- In the Apple Developer Center, navigate to the Certificates, IDs & Profiles and select Identifiers->App IDs from the left column. To register your application, you need to enter an application name which should match exactly with the name of application inside your Xamarin project. Follow the instructions to enter the bundle ID either in Explicit App ID or Wildcard App ID section as per your requirement. You can enable the App services as per your necessity and click on Continue.
- Confirm your App ID information and click on the Register button to create your application ID.
Adding a Device
- You need to start the Xcode and connect the device to the Mac through the USB cable.
- Then choose Devices from the Windows menu of Xcode. Select the preferred iOS device and copy the identifier.
- Login to the Apple Developer Center. Select Certificates, IDs & Profiles and click on the Devices->All tab from the left column. Then click on the + button to add your device which will ask you to register your device with a Name and the UDID(identifier) that you copied from the previous step. By clicking on the Continue button, you can review your information and register your device.
- You can add multiple devices by following these steps.
Creating Development Provisioning Profile
- Login to the Apple Developer Center. Select Certificates, IDs & Profiles and click on the Provisioning Profile->Development tab from the left column.
- Click on the + sign to add a new provisioning profile and select iOS App Development in the Development section before clicking on Continue.
- Select your App ID and Continue to the next page. Then select your certificate and test devices. Enter the Profile Name of your choice. Then Download and double click on the file to add in the Xcode account.
- Open the Xcode and from the main menu select Preferences->Accounts. Click on the + sign at the bottom left corner to add your Apple ID. Then click on View Details to see all your Signing Identities and Provisioning Profiles. Then select your provisioning profile and click on Download All. Click on Done button to complete the process.
- If you have added a new device, then it has to be selected in the provisioning profile by editing in the Apple Developer Center.
Deployment Of iOS application
- To use a Mac machine as a Xamarin Mac Agent, you must go to System Preferences->Sharing and enable your Remote Login on your Mac machine. Note down the IP of your Mac machine from the System Preferences->Network.
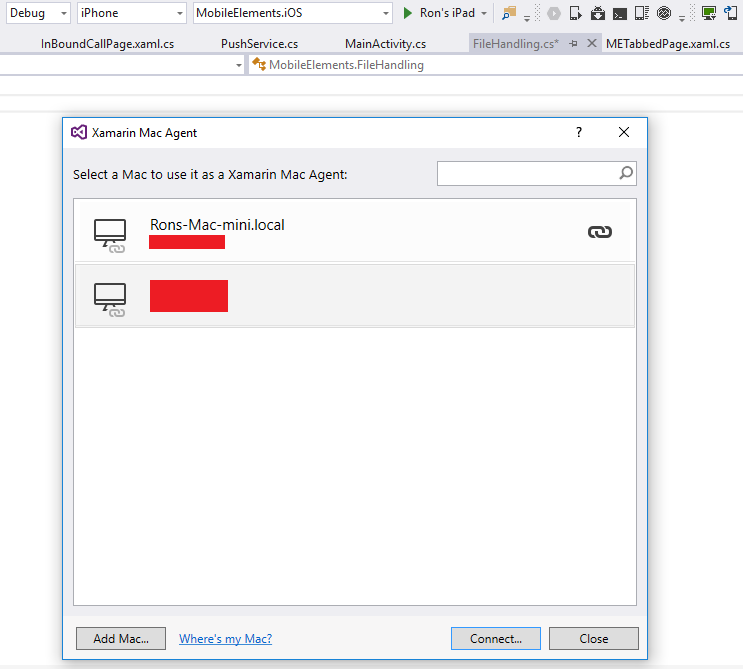
- While creating a Xamarin.Forms cross platform project in Visual Studio on Windows machine, you will be prompted to connect your Mac machine remotely. Add your Mac machine by entering its IP address. Then you will be asked to enter your Apple ID and password. It might take some time to connect to your Mac machine.
- Once you are connected to your Mac machine, you can see a green colored icon on the top of the toolbar which suggests that you are connected to Xamarin Mac Agent running on your Mac machine. Every time you restart Visual studio, it gets connected automatically or you have to click on this icon to connect it again.
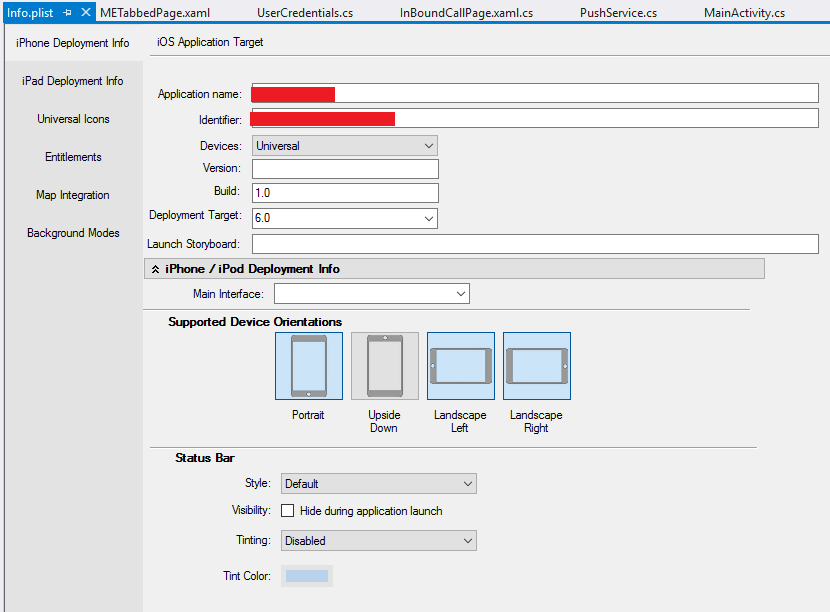
- To make your iOS application running on your device, you have to make a few property changes to your <Application_Name>.iOS project. Open the Info.plist file and change the Application name and Identifier to match the application name and bundle id in your Apple Developer Center.
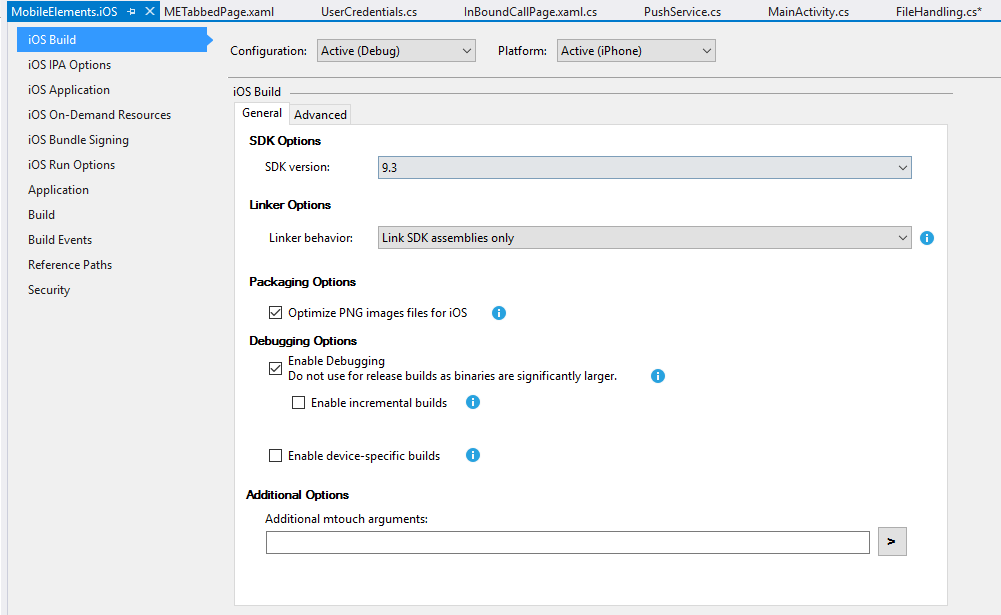
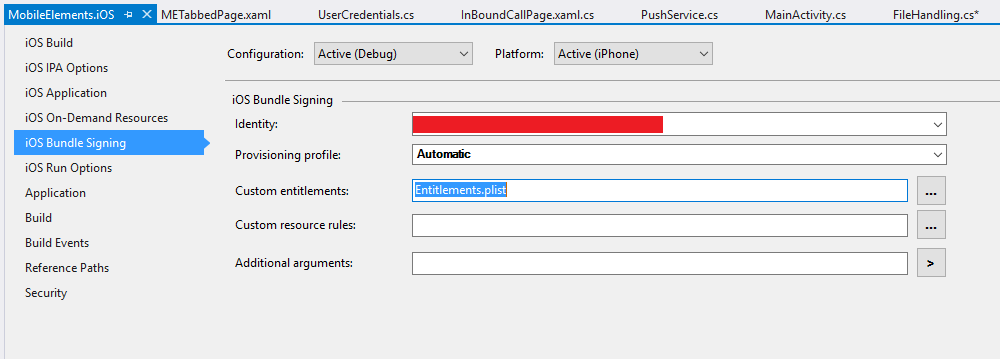
- Right click on the <Application_Name>.iOS project and open the Properties. On the iOS build section, select Link SDK assemblies only in the Linker Option. Enter the application name and identifier in the iOS Application section. In the iOS Bundle Signing section, select your Identity from the drop down and choose Provisioning profile, Custom entitlements as Automatic and Entitlements.plist respectively.
- Once you are done with all these configurations, then start building and deploying your application on the iOS device.