
Author’s note: This article supports our legacy products. At Inventive Labs, after two decades of providing telephony tools, we never stop supporting those who rely on our products to run their businesses. We no longer recommend Dialogic. This article is for our customers who are using legacy equipment. For more information about these legacy products and where we are today, read Ditch Dialogic & Convert to Voice Elements.
Our Call Progress Analysis feature is currently available on our Voice Elements Platform. To learn, please see HMP Elements Call Analysis Features and Voice API Features.
Call Progress has become increasingly complex as new technologies have emerged on the market. Cell phone providers, complicated voice mail systems, SIP carriers, and the like have made determining the outcome of a call more difficult. Every case has its own set of variables. For example:
- One cell carrier actually answers the phone, and plays music while it attempts to locate the called party.
- One Voicemail system plays “Ding-Dong”, a long pause, followed by a greeting… The Ding-Dong followed by the pause has the same pitch as “hell-o”, causing call progress to think a human has answered the phone.
- One SIP provider actually “connects” the call and then plays a “This number is not in service” without an SIT Tone causing call progress to think it has reached a machine.
Springware boards
Springware boards allow you to adjust certain settings to control how call progress works. Some of those settings are configured via CTI32Config and others are configurable in CTI32.ini file.
Edit Config File Settings
To properly enable call progress on Springware boards, edit the Default section of the CTI32Engine.Config file with the CTI32Config.exe program.
Locate the element called UseQualificationTemplates and set this value to 1.
Then switch to the dx_cap section.
For basic call progress that works for most installations set the following:
ca_intflg = 8
ca_lcdly = -1
Note: You can adjust other settings in the default section, based on your specific needs. For more information on individual settings of the dx_cap section of CTI32Engine.Config see: dx_cap
You must also enable the call progress templates in CTI32.ini.
Edit the cti32.ini file and navigate to the [CallProgress] section.
Set Enable=1
This will set the values for call progress analysis based on the remainder of the [CallProgress] section.
Note: You can adjust other settings in the [CallProgress] section, based on your specific needs.
Dialogic DNI Boards
CTI32 uses the most flexible implementation of Call Progress Analysis. This provides the developer with the most comprehensive control of CPA.
By default, the Dialogic DNI boards try to perform a default implementation of CPA that interferes with the more flexible implementation that CTI32 uses. Therefore, when using [DNI] boards and the Global Call protocol, the .config file for the DNI board in use must be modified to allow CTI32 to control the CPA.
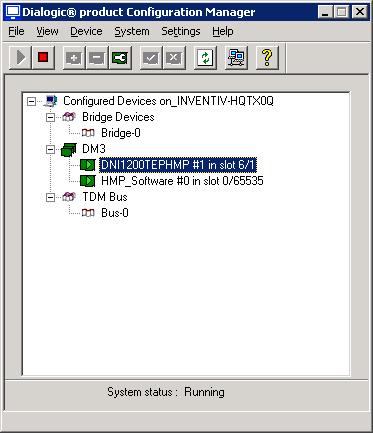
- Open the DCM and locate the DNI board in the list (See Figure 1)
- Right click on the board and select Configure device.
- Now, look for the name of the .fcd file that is in use. I.E.
- gnetworkonly_hmp_qsb_4_dms.fcd
- Locate the associated .config file in HMP’s data folder. Typically located in C:\Program Files\Dialogic\HMP\data.
- Backup the .config file (optional)
- Edit the .config file, changing the following item from y to n.
Before
Variant CallProgress y ! y=allow call progress, n=disallow
After
Variant CallProgress n ! y=allow call progress, n=disallow
- Save the file
- Open a Command Line (CMD.EXE) and switch to the HMP data folder. Typically C:\Program Files\Intel\HMP\data.
- Run the FCDGen.exe against the .config file to regenerate the .fcd file:
C:\Program Files\Dialogic\HMP\data>fcdgen gnetworkonly_hmp_qsb_4_dms.config
- Restart the DCM
Improving Call Progress on Dialogic HMP
This section only applies to HMP software or DM/V type boards to improve the outbound dialing results of determining when a phone is answered and if it is a human or a machine on the other end. It could also result in a busy, no answer, or invalid number.
You must find the .config file to the protocol that you are running. Go into the Intel DCM, Right click on the board (or HMP_Software #x if present) and Configure Device. On the Misc tab, there should be a description of the FCD File Name and PCD File name. Write the file name down. For example, on my test HMP system it was 4r4v4e4c4s4f4i_host_eva.
In the c:\program files\intel\data folder find the name of the file with the extension .config and edit that file.
Right after
[sigDet]

Add:
init i4

Note: change the i4 to however many channels that you have in your system. (This should relate to how many voice resources (licenses) that you have.)

After the 3rd SetQual in the same section add:

!Delete the default PVD qualification template
DeletePvd 128193

!User defined Pvd template.
PvdDesc signalId 128193
PvdDesc signalLabel 0000
PvdDesc minSnr 5
PvdDesc maxSnr 600
PvdDesc maxPk 2
PvdDesc maxRing 5
PvdDesc ringThresh 10000
PvdDesc PvdWin 8
PvdDesc PvdVthresh 250
PvdDesc PvdRbLow 380
PvdDesc PvdRbHigh 510
CreatePvd

!Delete the default PAMD qualification template
DeletePamd 106561

!User defined PAMD template.
PamdDesc signalId 106561
PamdDesc signalLabel 0000
PamdDesc minRing 190
PamdDesc mask 1
PamdDesc maxAnsiz1 125
PamdDesc maxAnsiz2 50
PamdDesc maxAnsiz3 220
PamdDesc loHiss 22
PamdDesc hiHiss 16
PamdDesc bhParm 5
PamdDesc cvThresh1 80
PamdDesc cvThresh2 165
PamdDesc maxCvThresh 390
PamdDesc nMaxBroad 2
PamdDesc nMaxErg 65
PamdDesc maxSilence 90
PamdDesc voiceThresh 25
PamdDesc silenceThresh 250
PamdDesc rjFbandLow 0
PamdDesc rjFbandHigh 0
CreatePamd
Open a command prompt in the same folder and type the following command:

Fcdgen <name of file.config>

Then go into the CTI32 Config utility and change the following under the dx_cap section:

ca_noanswer - 4000
ca_pamd_failtime - 1000

ca_noanswer increases the time after which a call is considered CR_NOANS to 40 seconds.
The default is too short and does not give some voice mail systems enough time to pick up.

ca_pamd_failtime - increasing this tells the system to allow more time to determine pvd vs pamd.
Left at the default, many outbound calls return a status of con_cad because live vs machine
can not be determined.
Editing the PCD File

Using a text editor, open the .pcd file corresponding to the .config file you just modified.

1. Scroll down to the [COMP sigdet] section and change the InitOption value from Yes to No.
The section should be revised as follows:

[COMP sigdet]

{ Attribute : Std_ComponentType:0x07
NumInstances : 96
ConfigOption : YES
InitOption : NO
DependentComp : waveAnalyser

Note that NumInstances will vary depending on the board in use. In this example,
 the value reflects a T1 board with 96 channels.

2. Save your changes to the .pcd file and exit.

Stop the CTI32 Service, Stop the Dialogic Service, Start the Dialogic Service, and start the CTI32 Service.